|
|
Post by bigstuck on Dec 18, 2010 14:07:45 GMT -8
You need to do some work on my Ford diesel now, it looks great. Bill if you still have all the stock exhaust you need to remove the cat and do a downpipe upgrade. you will be amazed at what that will do for your power. Your stock downpipe is a flat oval that flows worse than a swizzle stick. You need to open that baby up to flow like a mcdonalds straw. |
|
flipflop
Ok to Drive
 attitude is everything
Posts: 178
|
Post by flipflop on Dec 24, 2010 1:32:59 GMT -8
fivendime, after all of the bolt on's and misc. mods. how does the truck drive/perform? Hows your MPG working out also?
Regards,
flip.flop
|
|
|
|
Post by fivendime on Dec 24, 2010 13:38:13 GMT -8
I will do a quick report of what the mods did as far as noticeable improvements. I'll start with the Exhaust. Right off the bat I noticed a huge improvement on turbo spooling time. It will spool much faster then before, giving it a much more powerful feeling. Its not much noisier then it was stock which is odd but it makes a nice tone at full throttle. Next is the Boost Fitting I installed on the wastegate line of the turbo. That made a little difference but not noticeable to be crazy about. I think once I put the governor spring kit in, it will be a whole different truck. BHAF, or air filter was another slightly noticeable difference. It allowed for slightly faster spool time as well. It makes more turbo noise now which I like.
I got about 1-2mpg better since the mods. I was running around 17 mpg city before the upgrades. Since then I have been getting about 19 mpg in the city, not bad for a land yacht ;D
|
|
|
|
Post by fivendime on Jan 9, 2011 18:43:14 GMT -8
Did a little more to the dodge since then the last post. Went to Woody's 4x4 where Lee helped me do the pinion seal.....or shall I say I helped Lee, as he did most of it while I learned and lent a hand. Took us a fair bit of time to mess with because we had to machine down the seal surface of the Yolk because there was a groove from the old seal. That and I learned that These trucks never came with a Dana 80 from factory in the 3/4 ton trucks. So I either have a factory option or a junk yard upgrade. Either way I'm happy its a D80. My next venture was today. I eliminated the KDP or Killer Dowl Pin issue. I wont go into much detail as to what I had to do but basically it was pulling two reservoir bottles, fan, radiator hose, fan shroud, oil filler tube, crank sensor, harmonic damper, timing cover and a crap ton of bolts. Took me about 6 hours to perform the job. I have yet to start it so I hope that my .051" setting for the crank sensor is good, tolerances are between .049" and .051" so I should be ok. Here is a shot of the KDP tab that I made to cover the dowl pin under the timing cover. 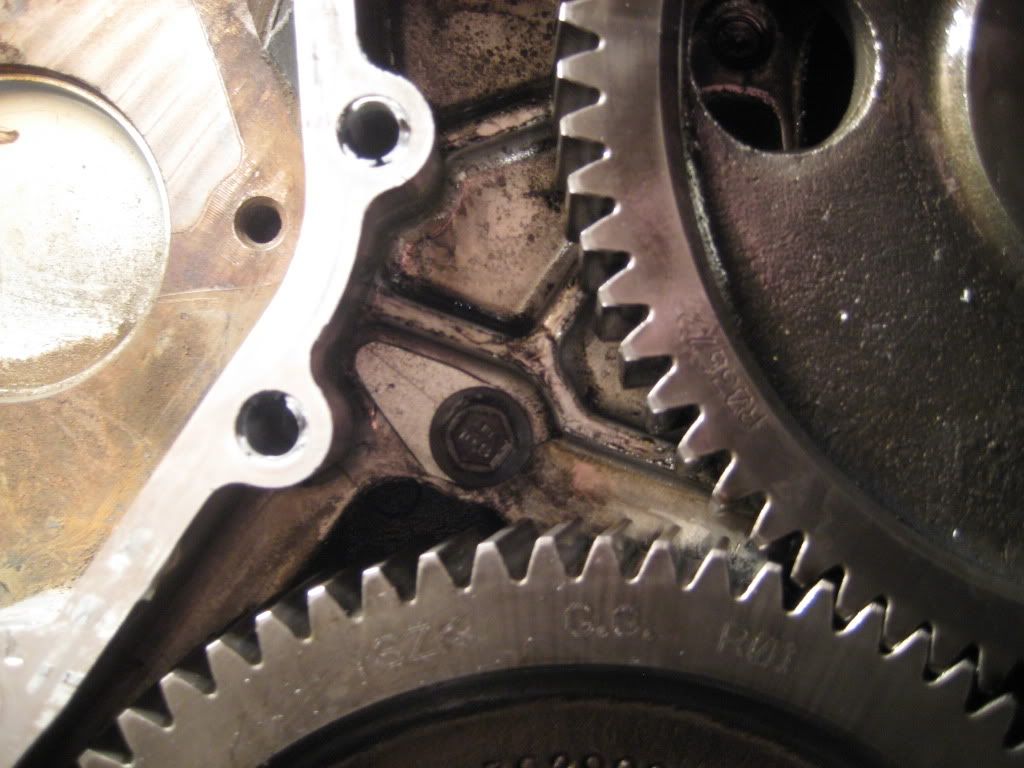 |
|
|
|
Post by bigstuck on Jan 9, 2011 18:45:41 GMT -8
some good upgrades to a truck thats going to last you a long time! Lee said that yoke was pretty bad. But good thing we got the tools handy to fix yours as those things new can get expensive quick!
|
|
|
|
Post by fivendime on Feb 5, 2011 18:50:24 GMT -8
Did another rather large undertaking today and learned a whole lot more about adding power to this thing for free! I did the AFC modifications today as well as the fuel plate modification. This is a task I almost didn't take on because of the amount of knowledge it takes to do and what it will take to do to re-tune my truck after these mods are done. Anyone who knows me knows I'm down for the challenge and chance to learn a new automotive skill. So I dove head first in it today. I will explain what I had to do along with the pictures. To start with I pulled some vacuum lines, the oil dipstick tube as well as the intake and got them out of the way for the job of removing the AFC housing and Fuel Plate. In the middle of the picture is the AFC housing, it has that brass barbed fitting coming off of it. That whole mess has to come out, but not as easy as it looks. Chrysler in there infinite wisdom put a tamper proof bolt on...basically a bolt with a round hole in the top. So I got the Dremel out and made a slot. That didn't work because I didn't have enough room for a large screwdriver and a small one wasn't working. So I took a cold chisel to it and broke the top off. 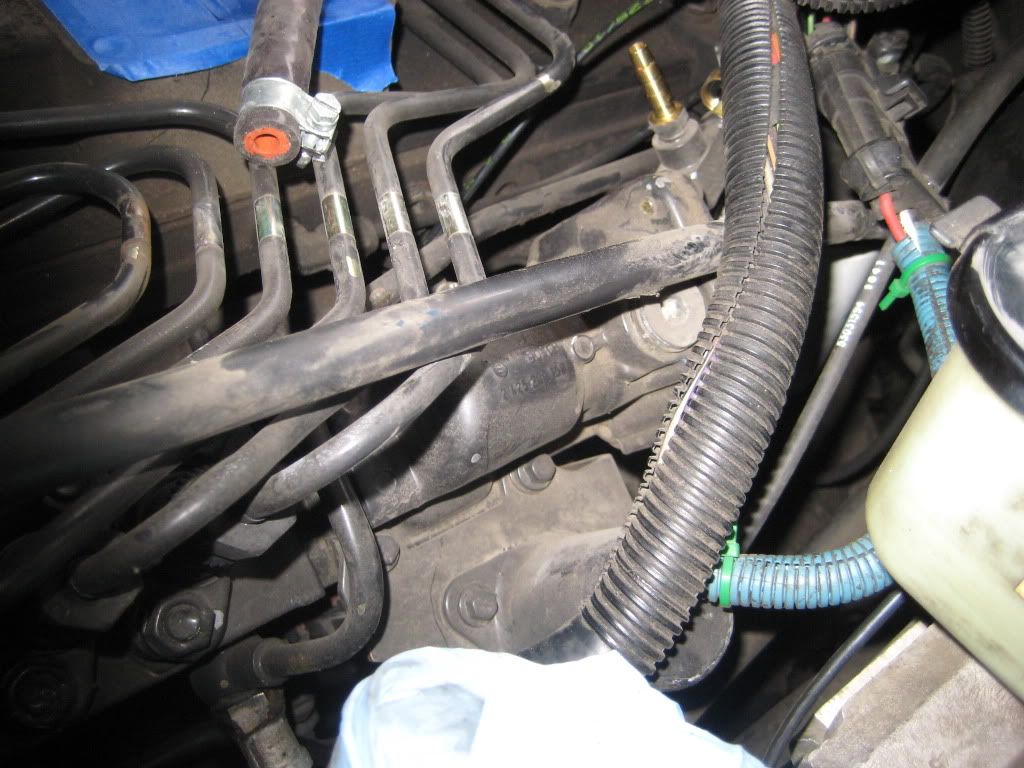 This is it off and on the work area.  On the housing itself is 2 more tamper proof screws which you can see in the upper left and middle screws in this shot. The Dremel did its job again and with all the room in the world they came off easy. 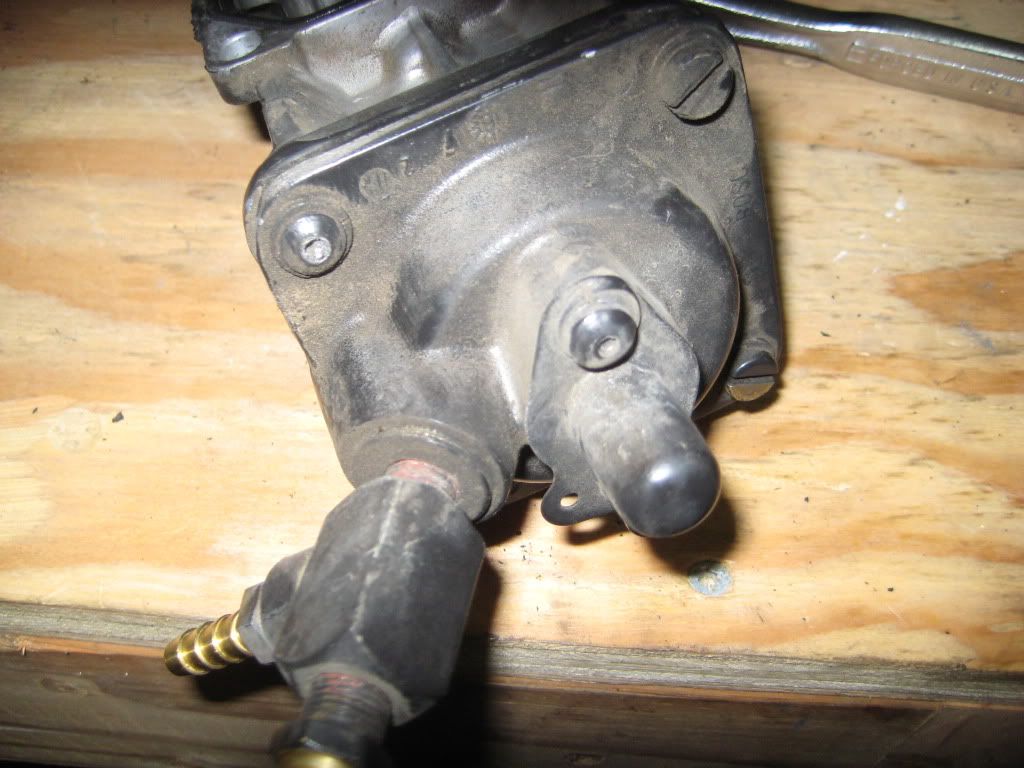 Now things get a bit more complicated. I pulled all the guts out of it and stared cleaning and modding. This is the area where vacuum goes into the unit to produce pressure on that orange badder via turbo pressure. That little screw in the center of the aluminum cap is what is called the pre-boost screw otherwise known as the smoke screw. It controls your boost fueling from 0-5psi and lights the turbo to get it spooling. 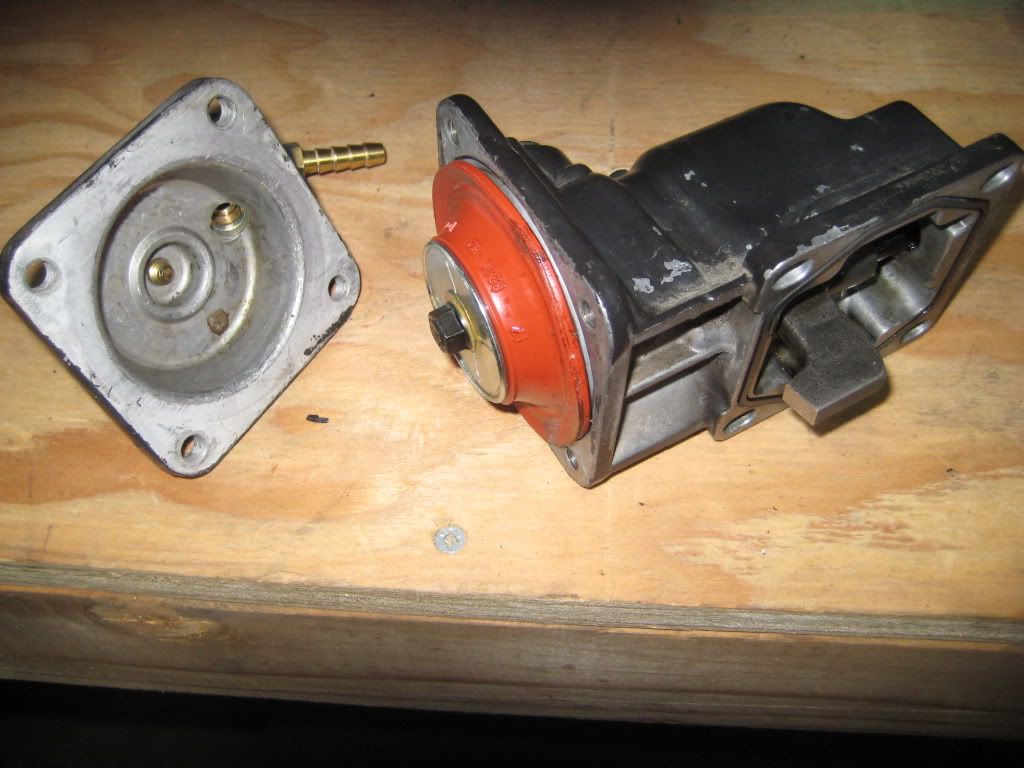 This is the stuff under that orange bladder. You have the AFC spring which is like a valve spring in looks. Then in the housing there is the starwheel which controls transient-boost fuel. That adjusts the AFC Foot as well. 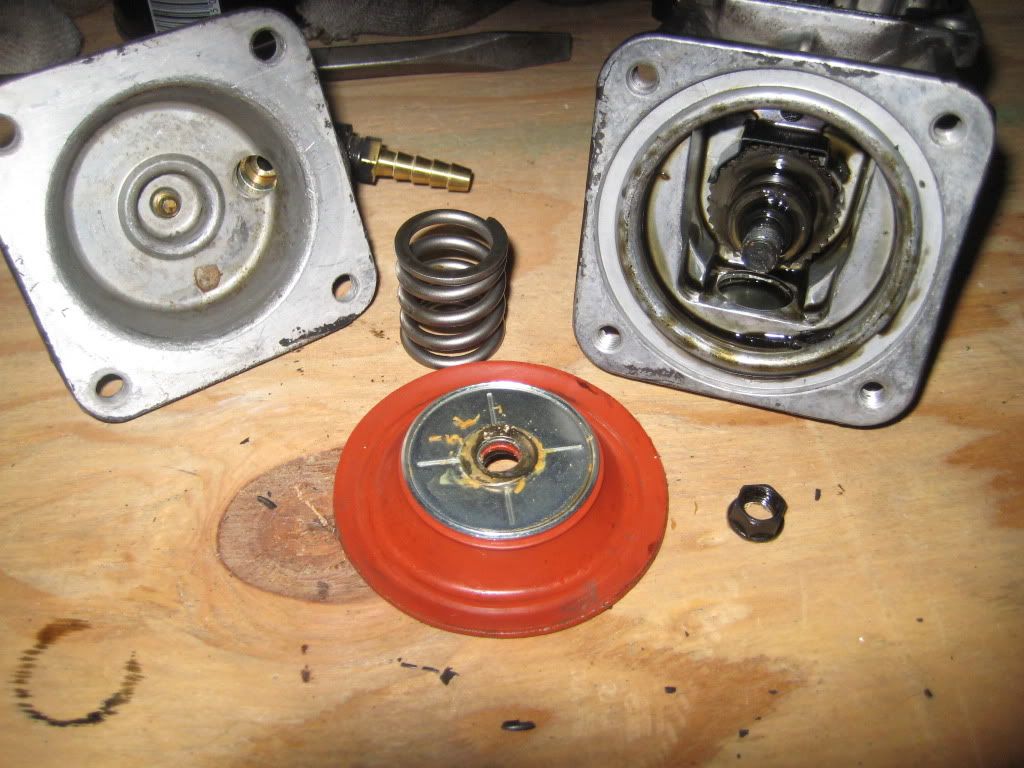 This is the side of the AFC that houses the AFC Foot. The foot essentially controls the rack of the fuel curve. In order to get full rack on the fuel curve I must grind off some of the foot to allow it to reach back further in the housing because now in stock form it hits. I must take between 1/16 to 1/8 of an inch off. 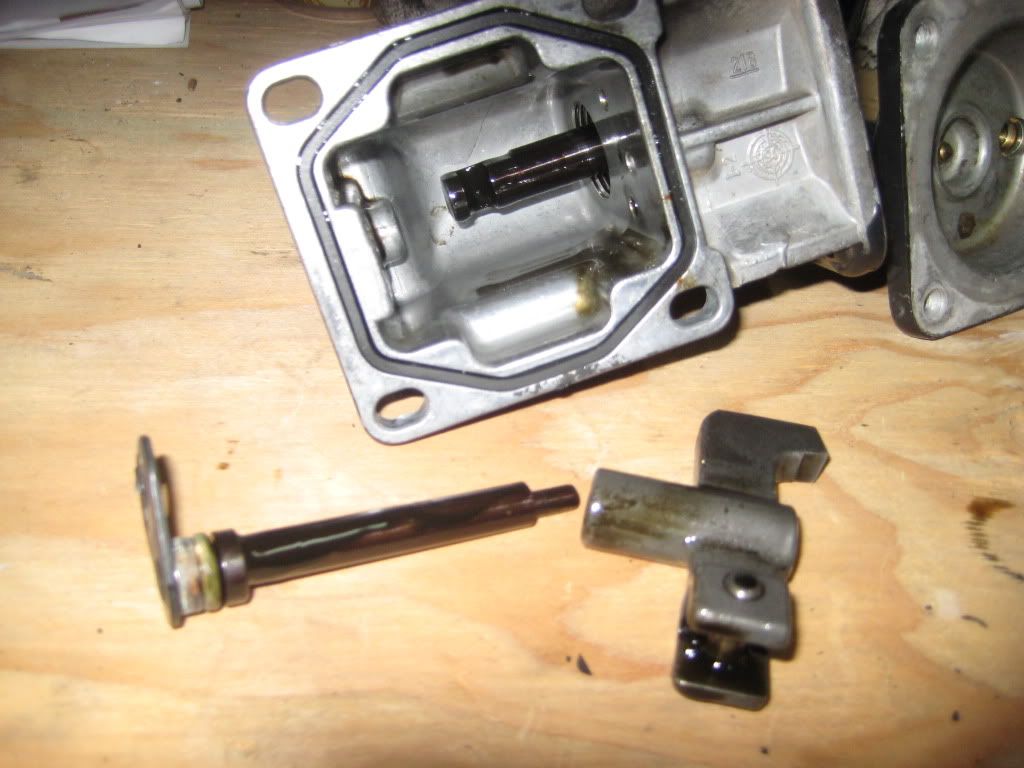 In this shot you can see I have the foot as well as a washer that went between the orange bladder and the AFC spring. This I will toss in the trash and opt for a 5/16" fender washer because its about 1/8 of an inch less in thickness, which again limits rack travel, and I'm trying to gain travel with these mods. 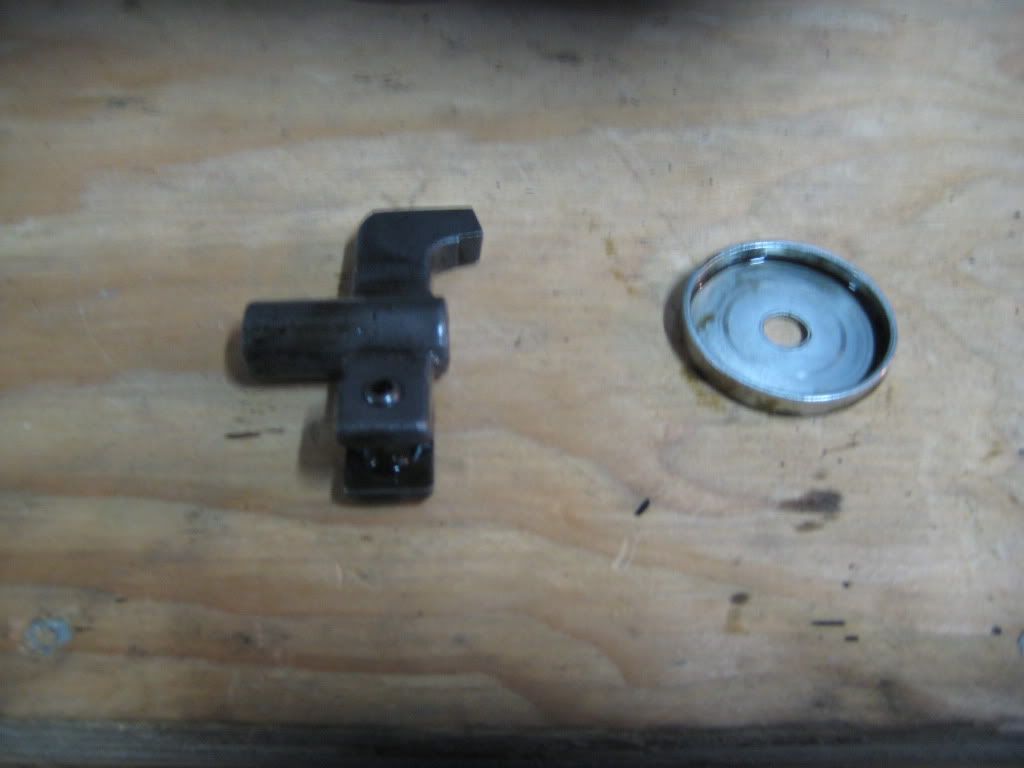 You can see I cut the end down a bit, filed it flat and sanded it smooth. Its not rocket science so it doesn't have to be spot on just very close. 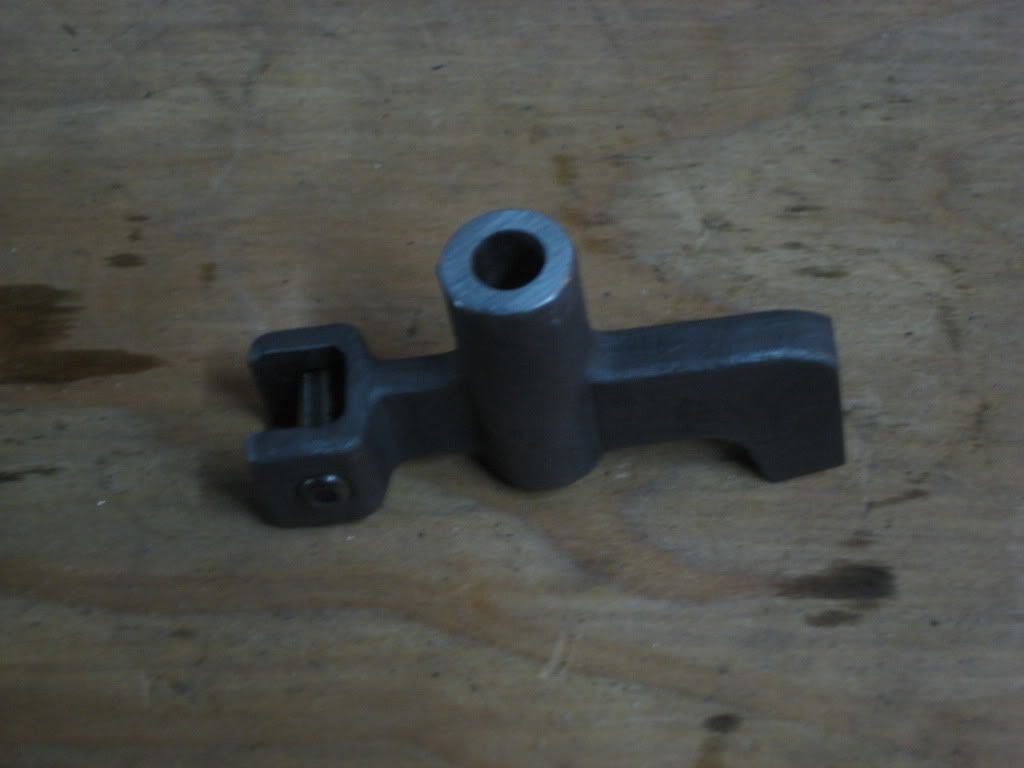 Then I put it all back together and adjusted the AFC foot for travel and slop. I will skip the part of adjustment but it has to do with that starwheel and pressurized air. Next was the Fuel Plate modification. Again not rocket science but needed to be very close. Here is both a shot of stock and modded. The modded one is the bottom picture. 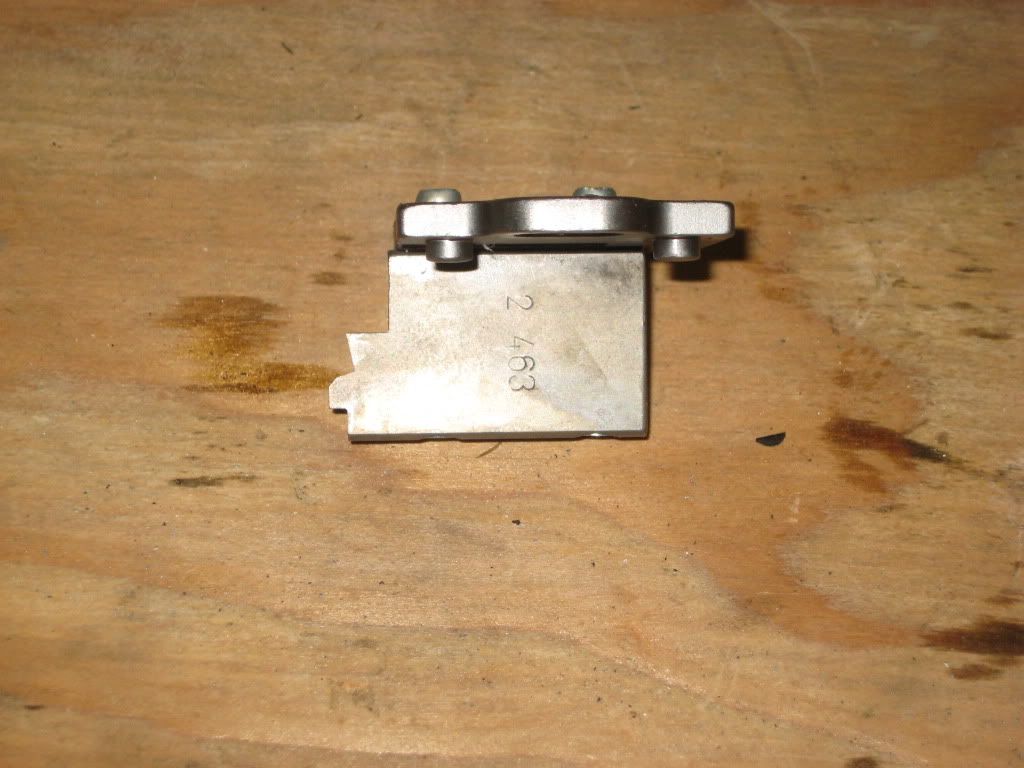 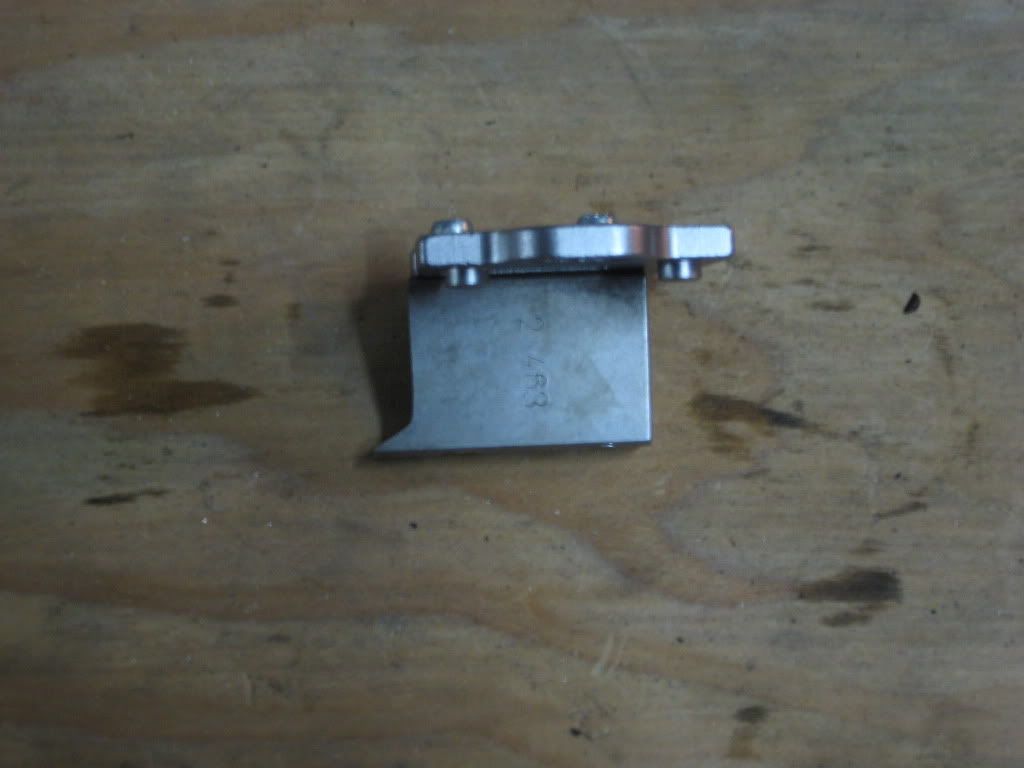 I took it for a test drive and WOW  It was suppose to net me another 50 Horse power at least and who knows how much torque. I set the Fuel plate fully forward in adjustment as well as the AFC housing fully forward. To put it this way, my clutch starts slipping very bad in 4th gear and in 5th, well I might as well not even have a clutch cause it slips so bad you cant believe. I knew this going into it but I didn't think it would be that bad. Of course I was in the pedal trying to flog it to find out what it would do. I'm super happy, now its time to tune it to get it spot on! |
|
|
|
Post by bigstuck on Feb 5, 2011 23:43:50 GMT -8
Back it off to the limit of your clutch till you can afford a South bend. So when is the trans coming out for the fifth gear mod?
|
|
|
|
Post by bigstuck on Feb 5, 2011 23:44:57 GMT -8
Sounds like your learning alot though Joey. And thats the best way as long as your wallet doesnt suffer in the end.
|
|
|
|
Post by fivendime on Feb 6, 2011 10:04:12 GMT -8
Thanks Tom, this really has become a great learning process. I am researching clutches now and am going to order one on Monday from Valair. I have heard SB has some bad customer service from people on the CumminsForum and I dont want to deal with that. Its not going to be cheap but I'm almost done with putting money into this thing to make it a good tow rig. Clutch, GSK kit, and some repairs like the front axle u-joints and I'm good to go to Moab!
|
|
|
|
Post by bigstuck on Feb 6, 2011 11:21:35 GMT -8
Well if you want let me know I can get south bend products for a pretty smoking deal. I have sold quite a few with no issues. Oltman on here has there clutch in his truck with good results. I think he run the Con OFE
|
|
|
|
Post by petee on Feb 6, 2011 22:21:09 GMT -8
very nice.
|
|
|
|
Post by fivendime on Mar 16, 2011 20:59:26 GMT -8
Decided to pull the front axles out today and swap the worn out U-Joints with new Spicer units. I cant believe how worn these things were, some of the needle bearings were completely missing and some were non existent all together, just a cap running on the inner U-Joint body. It wouldn't have made it much longer. I got the old ones pressed out and the new ones in tonight. All I have left to do is clean out the housing and cover real good and toss in the new synthetic gear fluid. After that I get to mess with getting the steering stabalizer off, easy as it sounds its being a real pain. Thats it so far other then the fact that my 1400 dollar bill for the clutch and install. I had that professionally done but bought a very good clutch which should outlast the truck. This thing should be called a Jeep. I will toss some picks up later. Just thought I would do an update ;D
|
|
|
|
Post by fivendime on Mar 30, 2011 17:44:04 GMT -8
Update. Since I last posted I have got the Dodge ready for the Moab trip as best I can. I ended up throwing in the towel with the steering stabilizer and buying a new tie rod end with the hole in it and junking the old one that still had the factory stabilizer attached to it. I should have done that in the beginning to avoid any name calling to my truck. The U-joints no longer make a clicking noise and no fluid leaks thus far! Here is a pic of the worn U-Joints. Dry and Rusted is how to explain it....oh, and broken pieces on some of the caps like in the photo 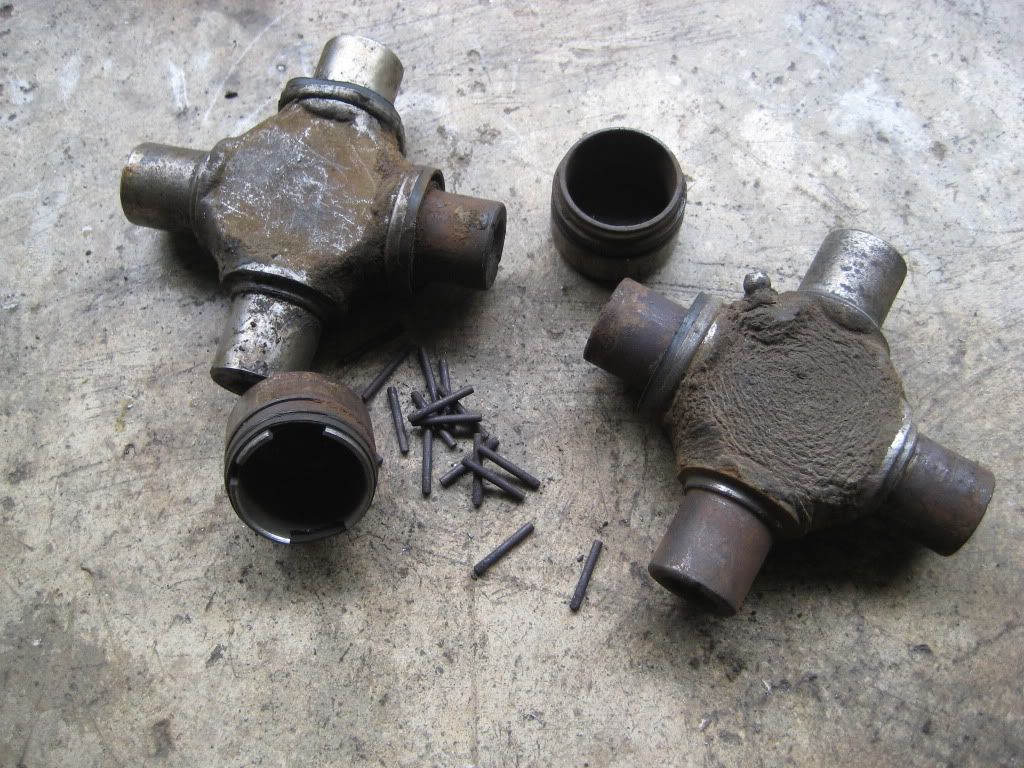 |
|
|
|
Post by racincowboy on Mar 30, 2011 18:54:33 GMT -8
Wow those u joints are beyond toast. I see a grease zerk on there maybe the previous owner thought they were automatically greased. Glad you got them changed out before it got real expensive when one came apart and took out other stuff.
|
|
|
|
Post by fivendime on Jun 3, 2011 10:27:06 GMT -8
Stay tuned for my latest project.....not really for the dodge but it is bolted to it ;D Pics and details soon........... Well, I'm not completely done with this but it looks like I wont be getting much done on it for a few days now so I will post up what I got so far, which is near complete minus a few details. I recently bought a camper for my truck so I dont have to tent it anymore (a sigh of relief) so I needed some brackets to tie this thing down in the bed. The previous owner dropped it off at my house so I haven't been hard pressed to buy a set. I started shopping for brackets and wow what a huge price, quality and strength difference. I looked on some forums and figured out that I needed some Torklift frame mounted brackets so I called them up directly and figured out what brackets I needed. I wasnt so in tuned with spending 400 bucks plus shipping whatever that would have been. So I drew up my plans, figured out what steel I needed and went to Eastside Steel (also hit them up for sponsorship so dont go there ;D) Total cost of steel was 78 bucks, and all the grade 8 hardware was 18. Here is what my idea was and how it all worked out. 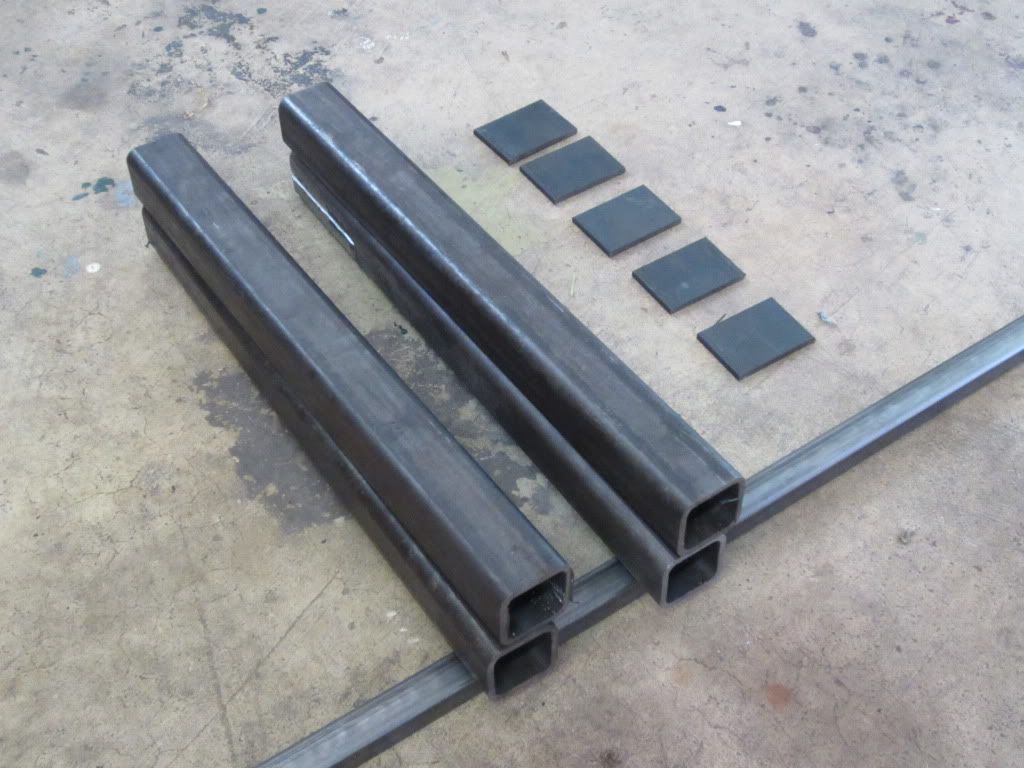 The weld seam on the end had to be dealt with so I ground a groove to slide my steel in. 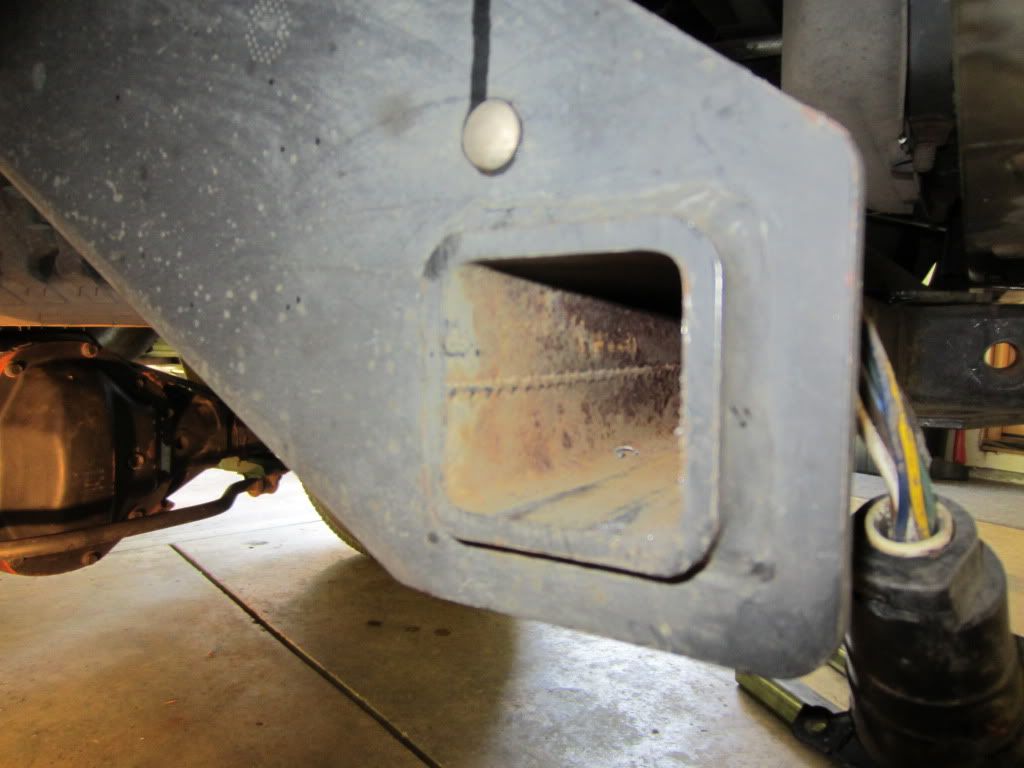 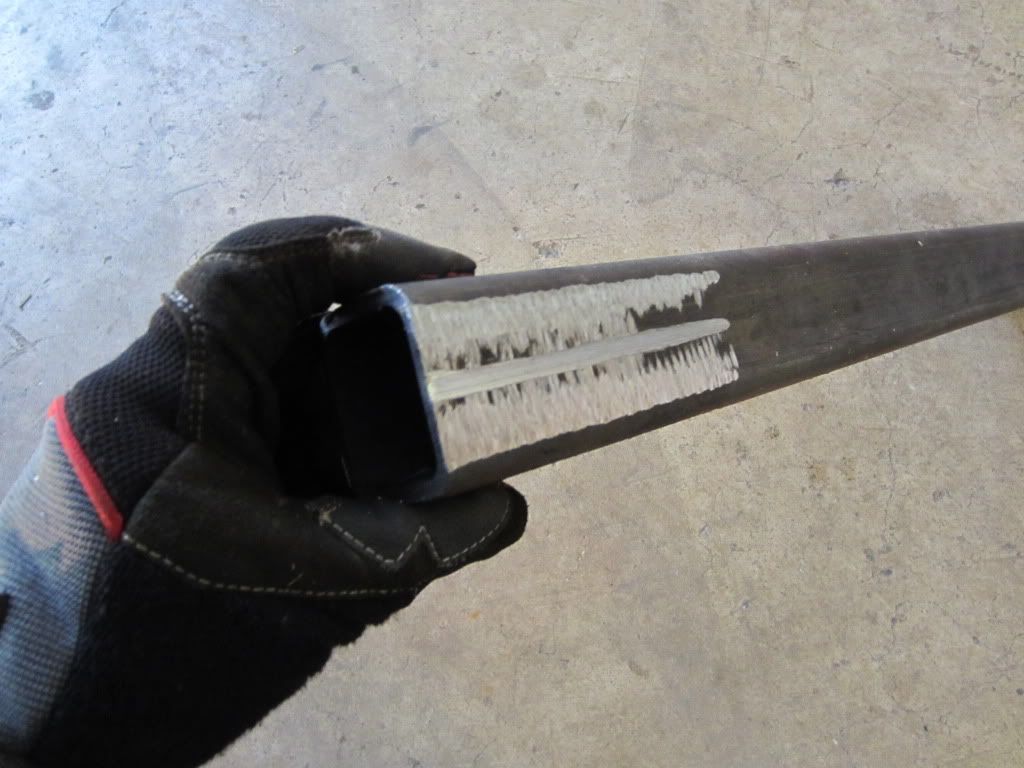 The steel slides in 4". I needed to drill a hole to bolt it in so thats exactly what I did. 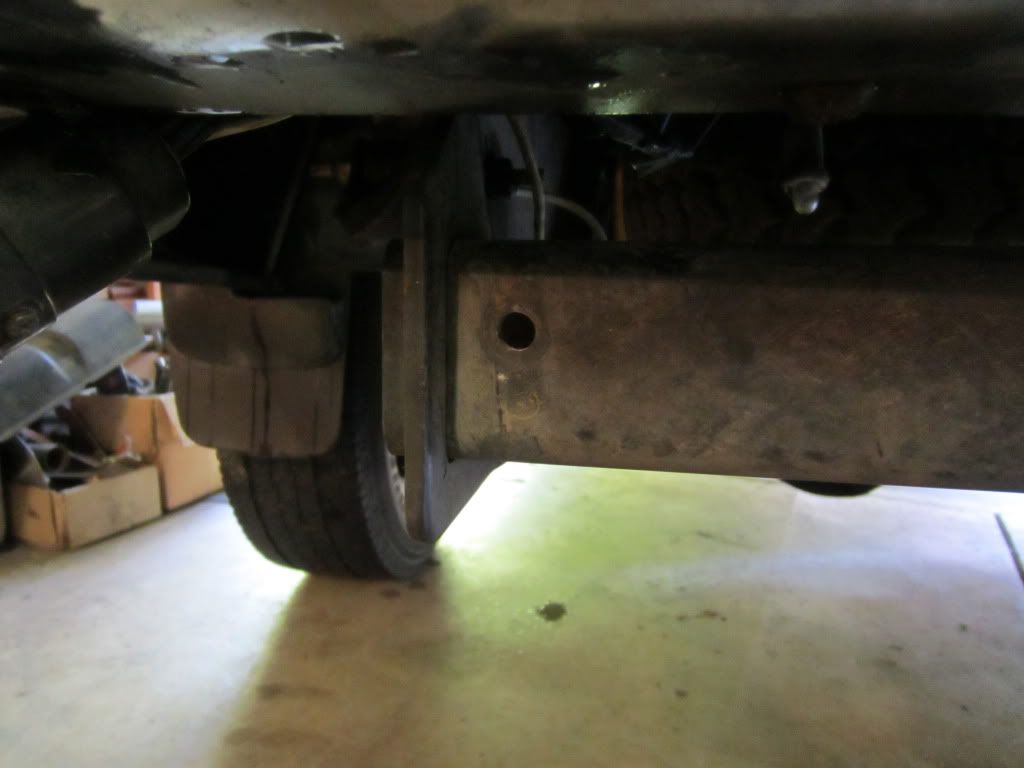 Then I tapped the bolt hole followed by welding a nutsert 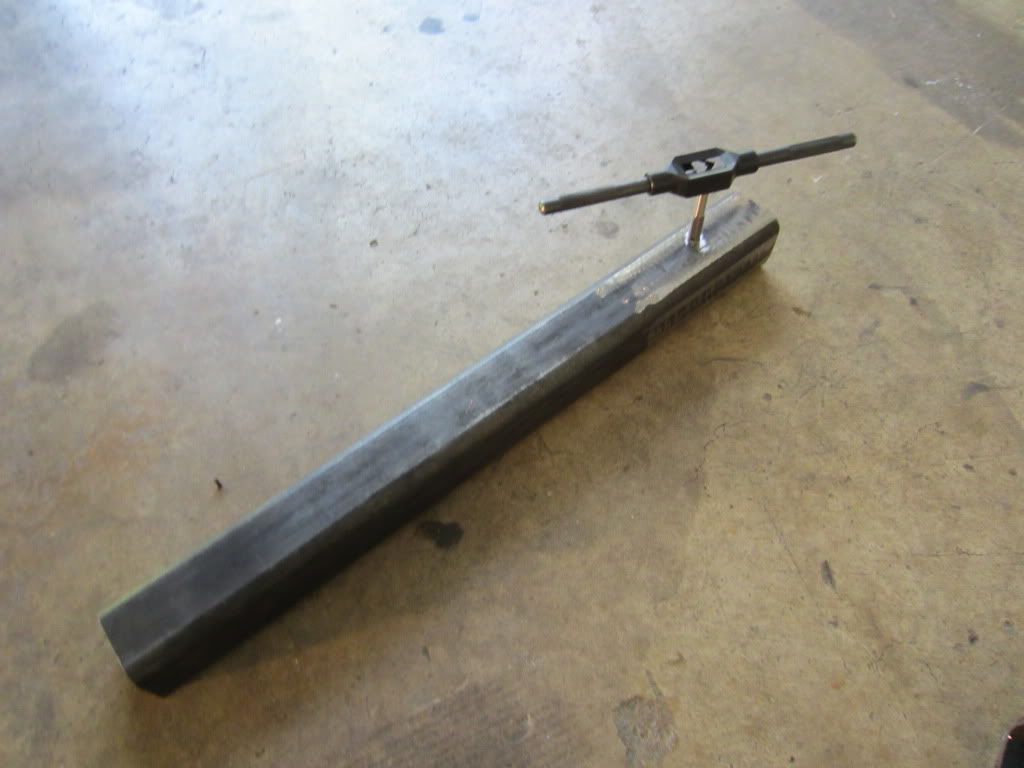 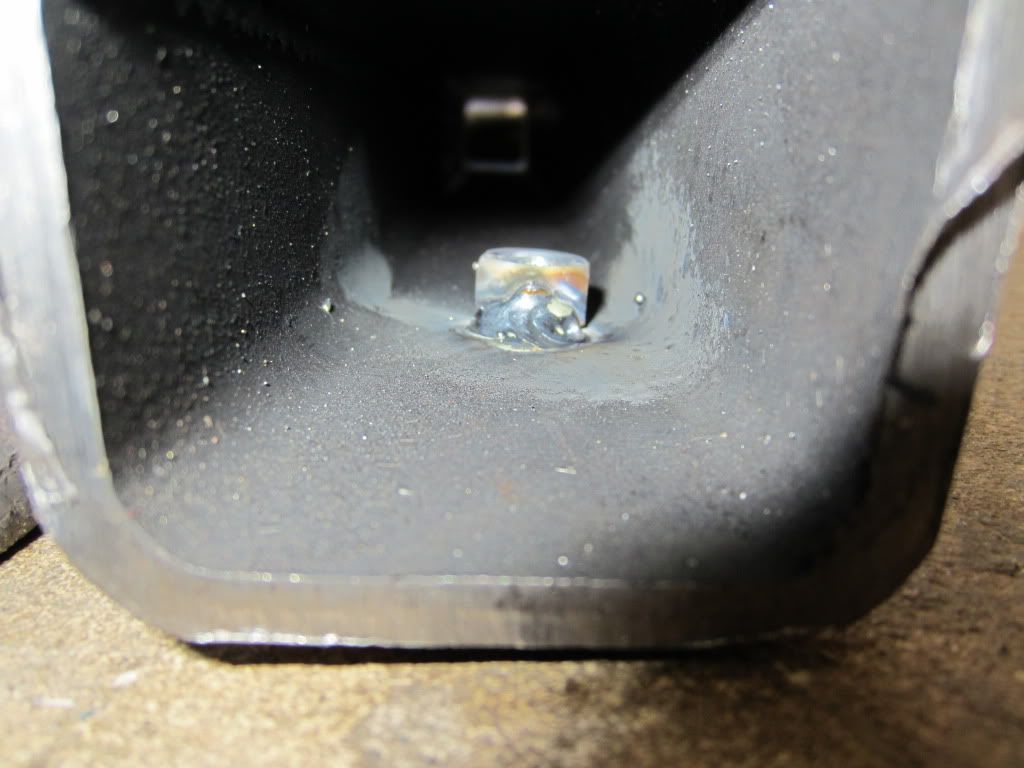 This is what the rear bracket looked like tacked up. 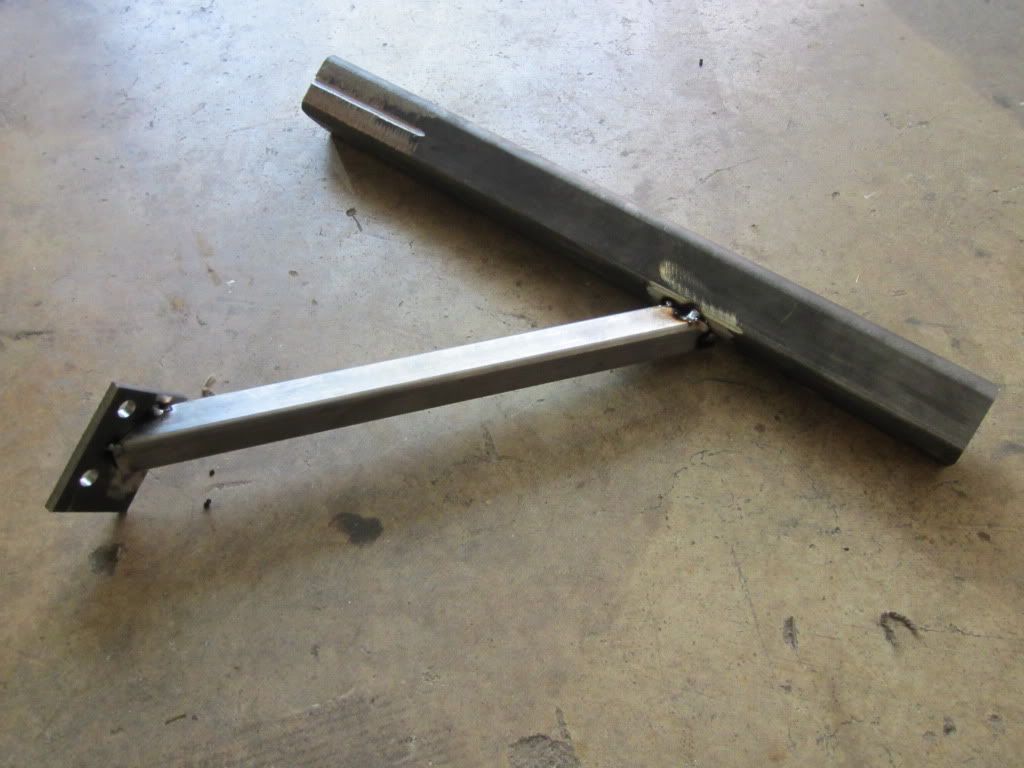 Finish welded set of rear brackets. 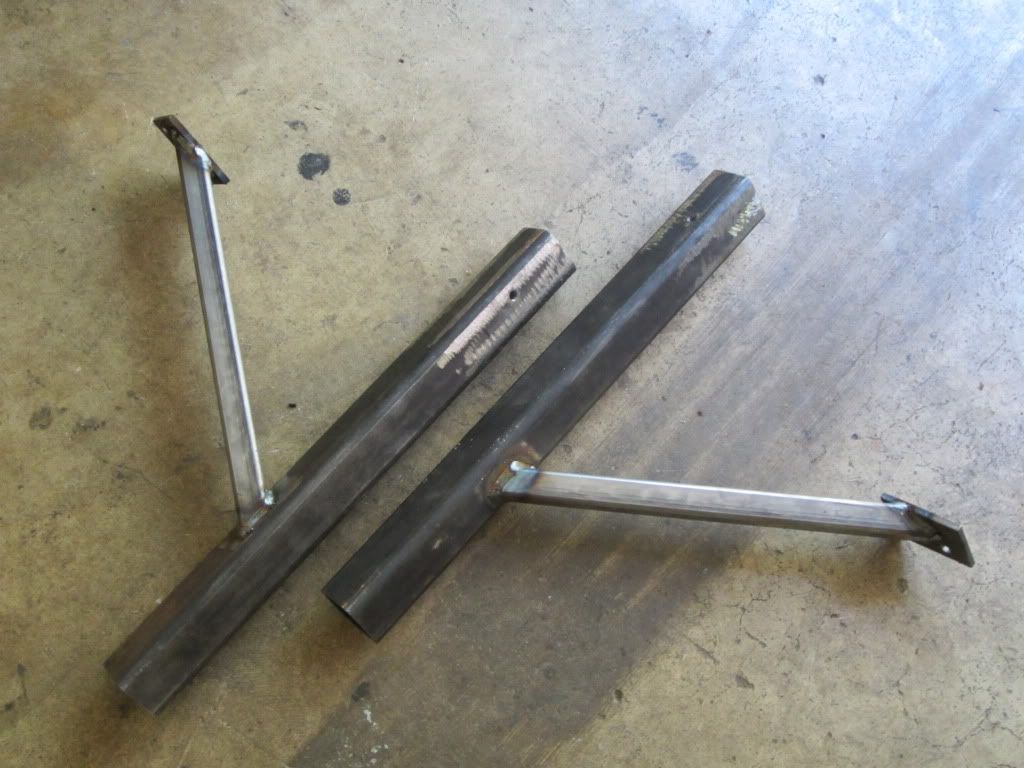 What it will basically look like bolted in. 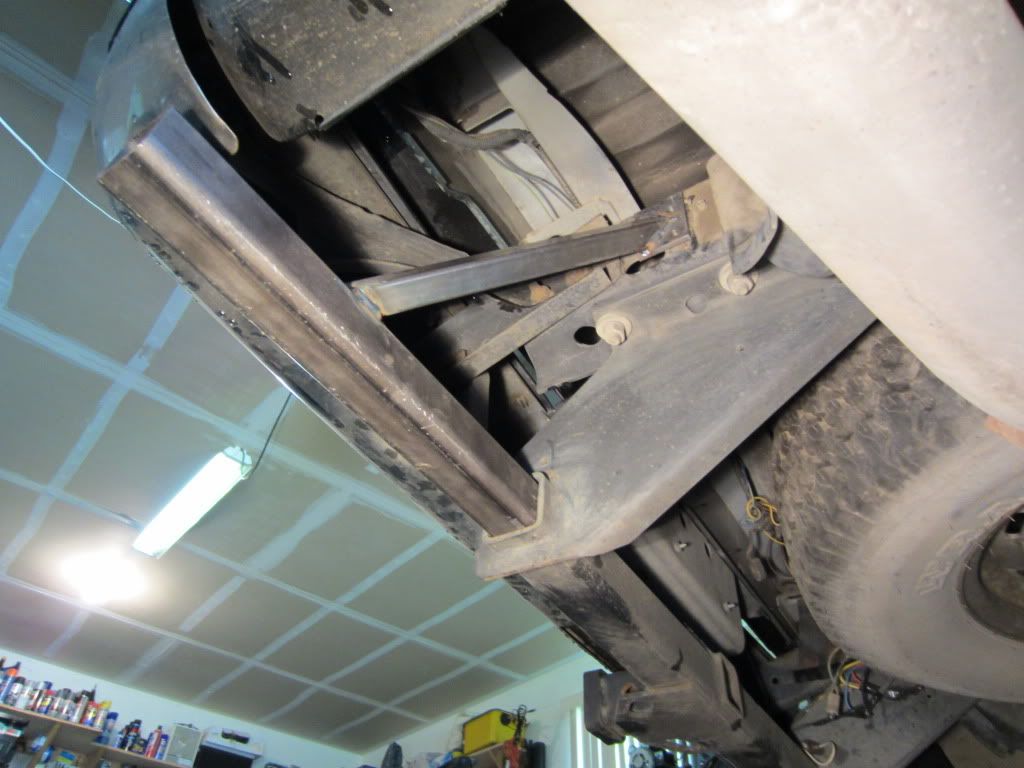 For the fronts....which was a pain to mess with. Not nearly as easy as the backs. After I found the best spot on the frame rail I made a couple brackets to weld on permanently. 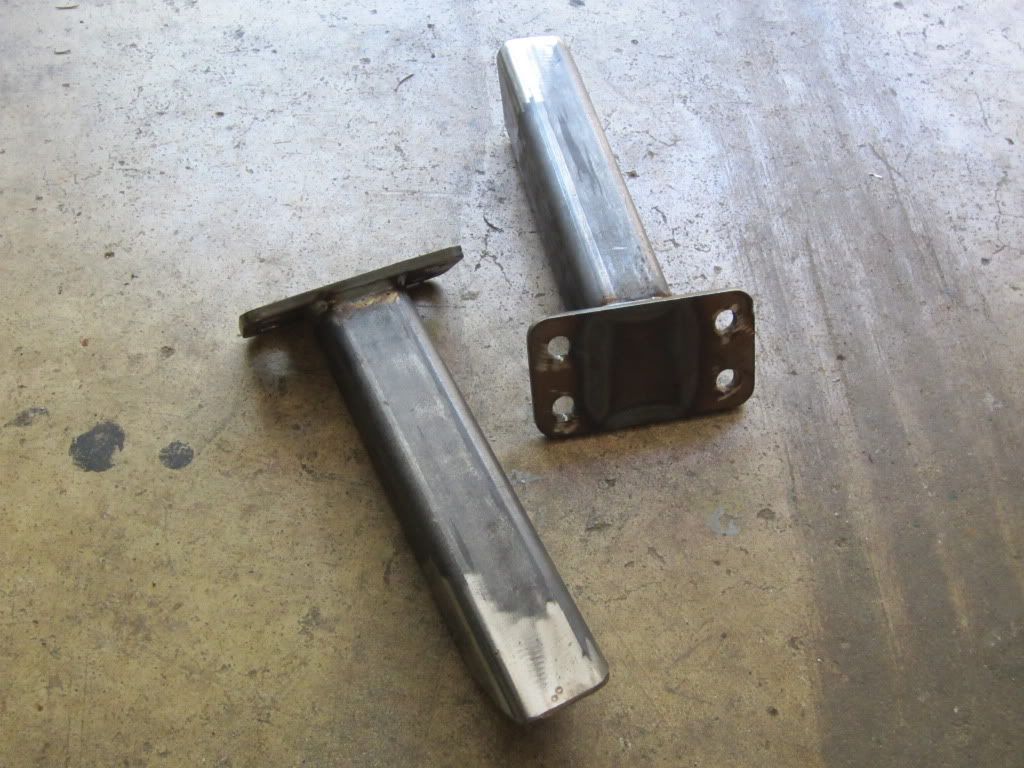 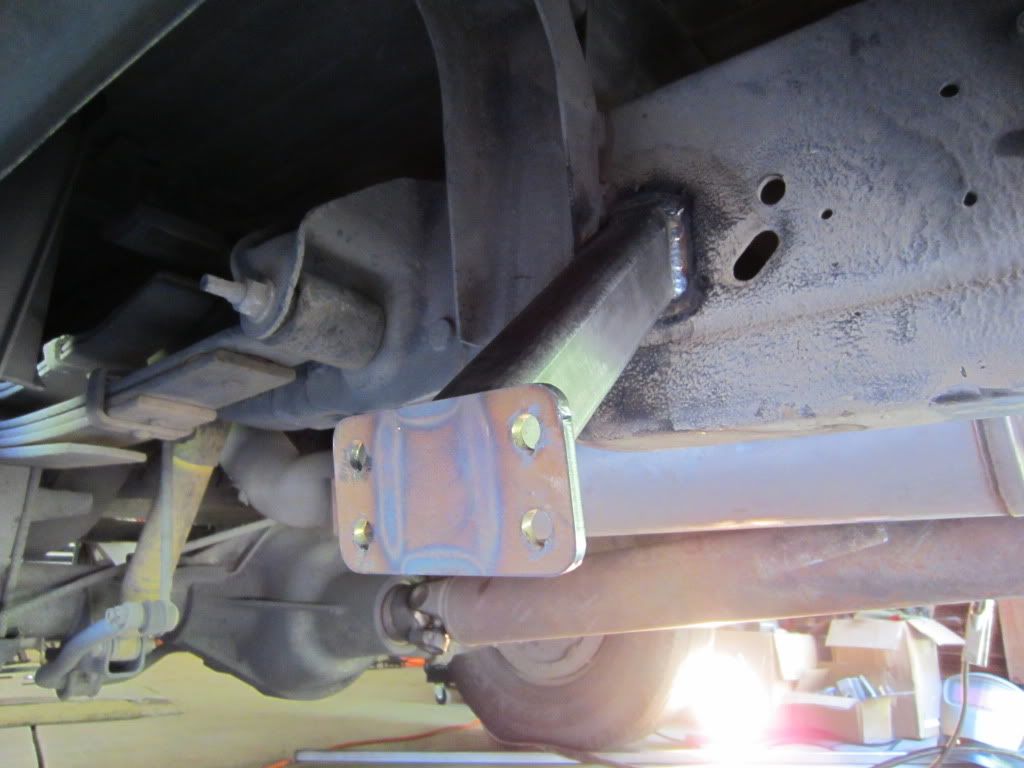 What it looks like tacked up. On the upper bracket I used the factory bed bracket to attach to using the factory bed box bolt. 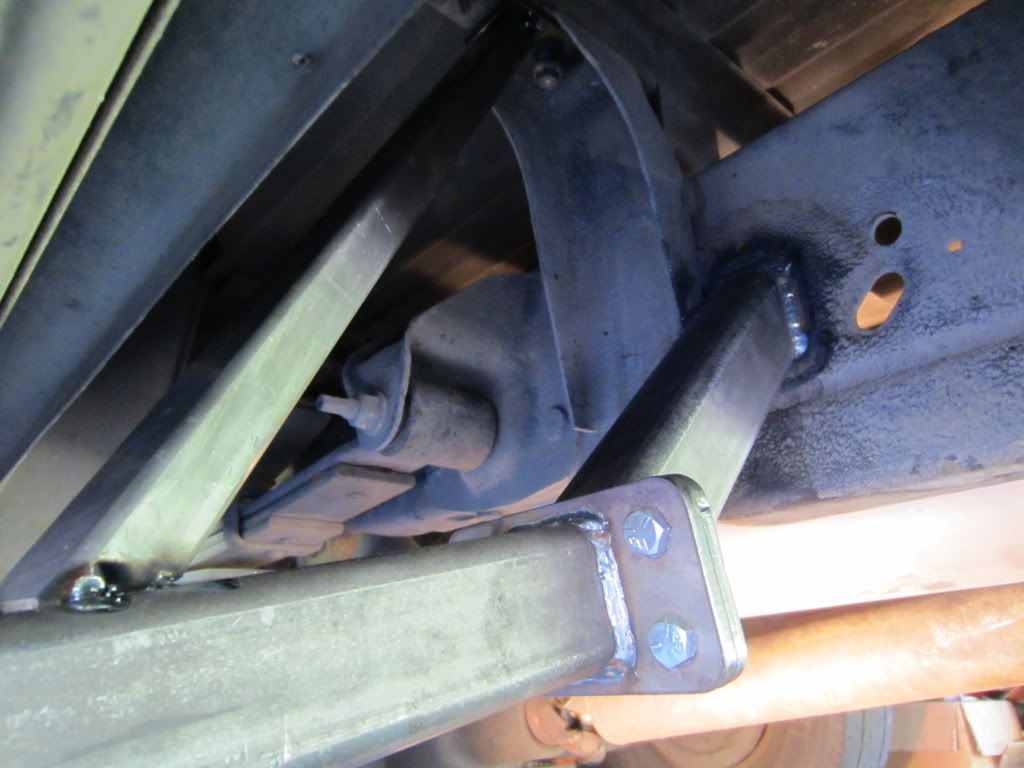 Finished front set minus the ones welded to the frame. 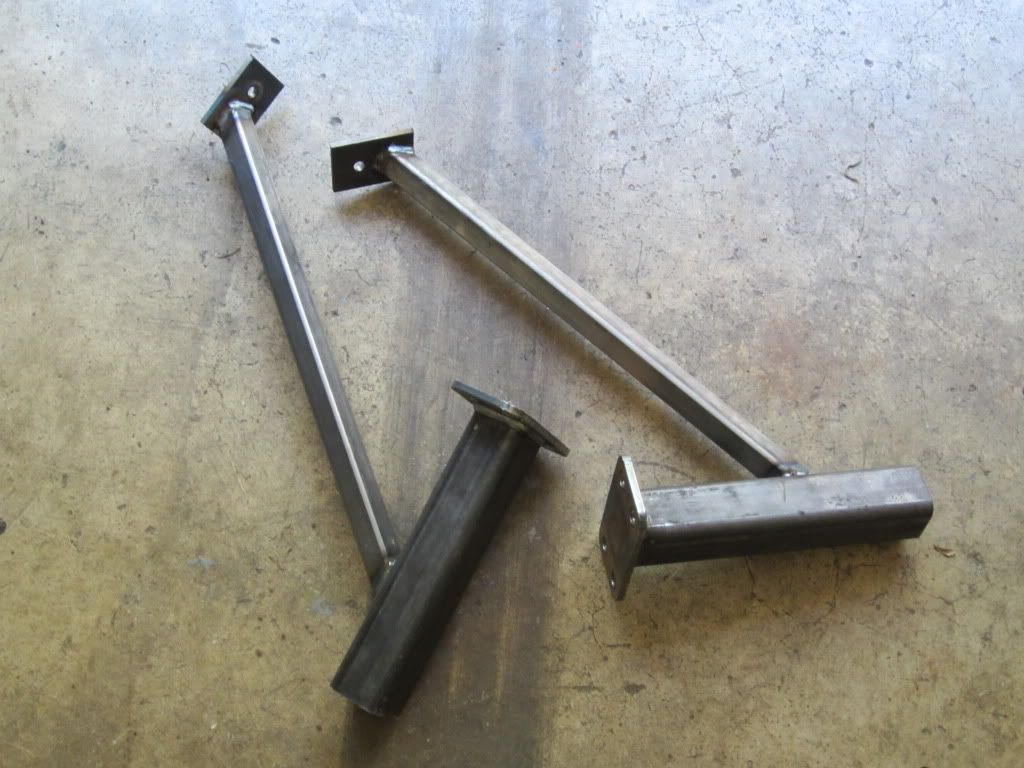 Completely painted and ready to install for test fit. The guy gave me the outer brackets from the Torklift set he had so those will slip in and have a pin to secure them. That's what my final details are. Basically putting the camper on and figuring out where I need to drill my holes for the brackets. The price of these sure beats the price of the new ones, and not to toot my own horn but I think they look better too ;D 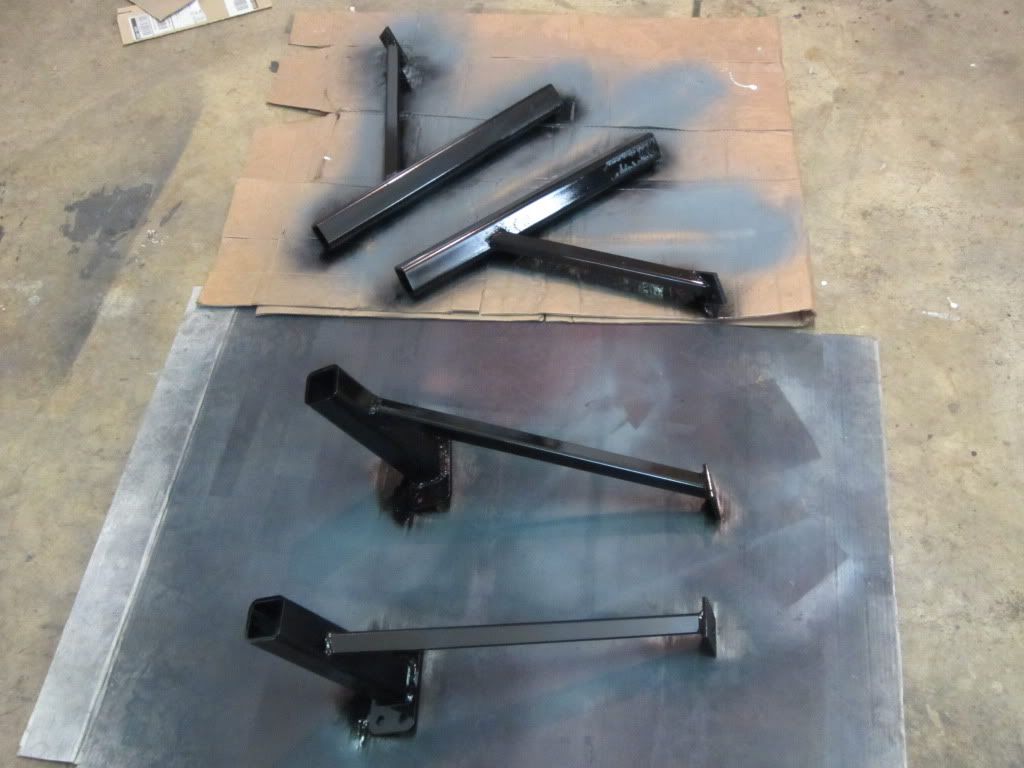 |
|


 It was suppose to net me another 50 Horse power at least and who knows how much torque. I set the Fuel plate fully forward in adjustment as well as the AFC housing fully forward. To put it this way, my clutch starts slipping very bad in 4th gear and in 5th, well I might as well not even have a clutch cause it slips so bad you cant believe. I knew this going into it but I didn't think it would be that bad. Of course I was in the pedal trying to flog it to find out what it would do. I'm super happy, now its time to tune it to get it spot on!


