|
|
Post by fivendime on Mar 11, 2012 21:18:41 GMT -8
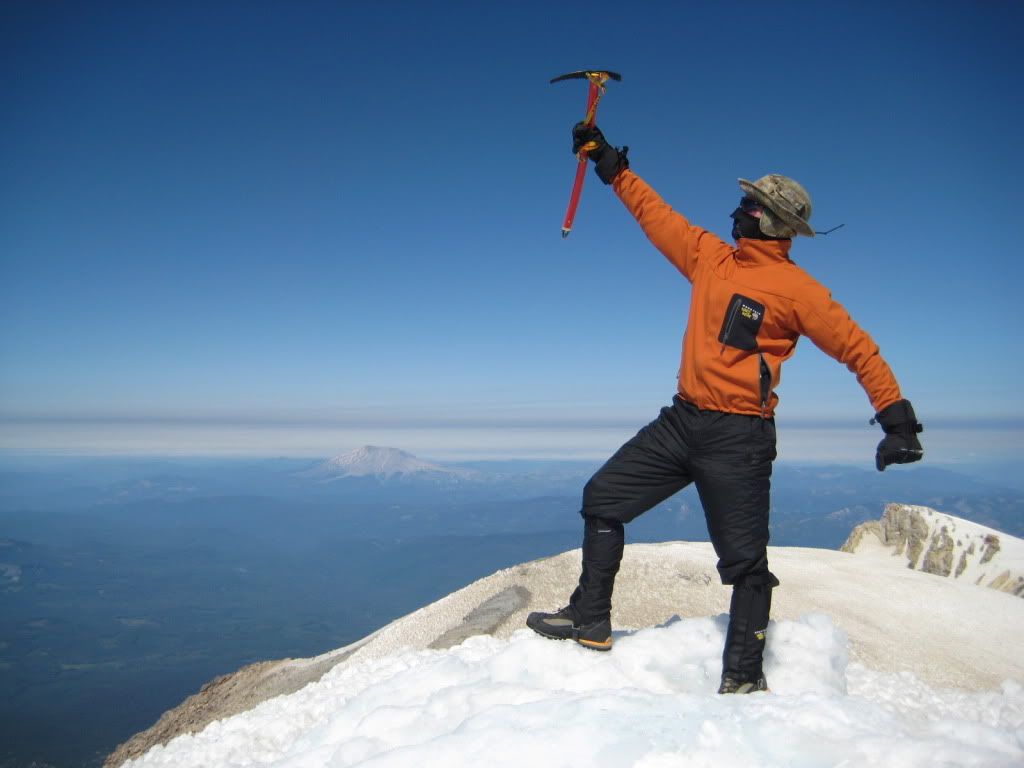
Ive done a fair amount of work on the truck since I last posted. Including a 5" lift and 35's and wheels. I took the truck to the spring shop to get the rear end lifted up to level out the truck. Ended up using a place called Oregon Auto Spring which did a fantastic job and was very reasonable in price. In total I dropped the truck off on a Wednesday and had it back on Friday. They pulled out the factory springs and overloads and re-arched the main pack, put new bushings in and added 2 more leafs as well as a couple small leafs at the bottom for added lift. They then re-arched the overloads and spaced them a little closer to the perches they hit when under load. I had them move them a little closer due to me having a camper I haul in the bed along with towing the trailer. I wanted the overloads to do the brunt of the work as soon as possible. They cleaned and painted it all and tossed in some new U-bolts and charged me a small fee of $675 total. It should have been 150 bucks more but they said the bid they gave me was what they would do. I am super happy with the work, and the ride quality is far superior to the stock setup. Today however I decided to tackle an issue I have had since I bought the truck. I have been tossing money into the front end of this think like its going out of style. New $150 dollar unit bearings for a grand total of $300 bucks. I also did the Ball Joints today which if I hadn't of gotten my deal at Napa would have been almost another $300 bucks, but luckily I got a nice price discount on them, which brought them to around $200. It took me a total of 6 hours today disassembling the front end completely and installing new parts. I cant believe how much tighter this thing is now. I have yet to drive it but there is no ball joint or wheel bearing movement at all. My guess is that my slight memory steering issue will soon go away. Here is a few pics of the ball joint work. Here is the Stock ball joints compared to the new Dana/Spicer Units from Napa    I use anti seize on the mating surface for the unit bearing and Knuckle as well as the end of the axle shaft splines.   In all the job went pretty easy. Only issue I ran into was stupid move on my part to put the lower ball joint in before the upper. Its much harder to use the ball joint press if the lower is in before the upper. But hey, I've never done them on this thing before so now I know lol. |
|
|
|
Post by fivendime on Mar 14, 2012 8:04:32 GMT -8
I had yesterday off from work so I decided to get a few things done on the dodge. Ever since I brought it back from the spring shop I noticed a slight wobble/shimmy under load in 1st and 2nd gear up to about 30 mph. I thought my carrier bearing was going out but after thinking about it I had the same problem on my Datsun pickup when I dropped it 5" so I figured I would build a drop bracket for the carrier bearing so that the driveline would sit at a better angle. I tried to get both the upper and lower U-joint at both ends to have the same angle. After the spacer was in I took it for a drive and no more wobble/shimmy. Fixed! I then moved on to the rear sway bar end links. After the 6" or so lift it became evident that my sway bar links were way to short. The spring shop never put them back on and wired up my sway bar. So I went to work extending the stock units. Here is pictures to tell the story. Stock links sit at 9 3/4" 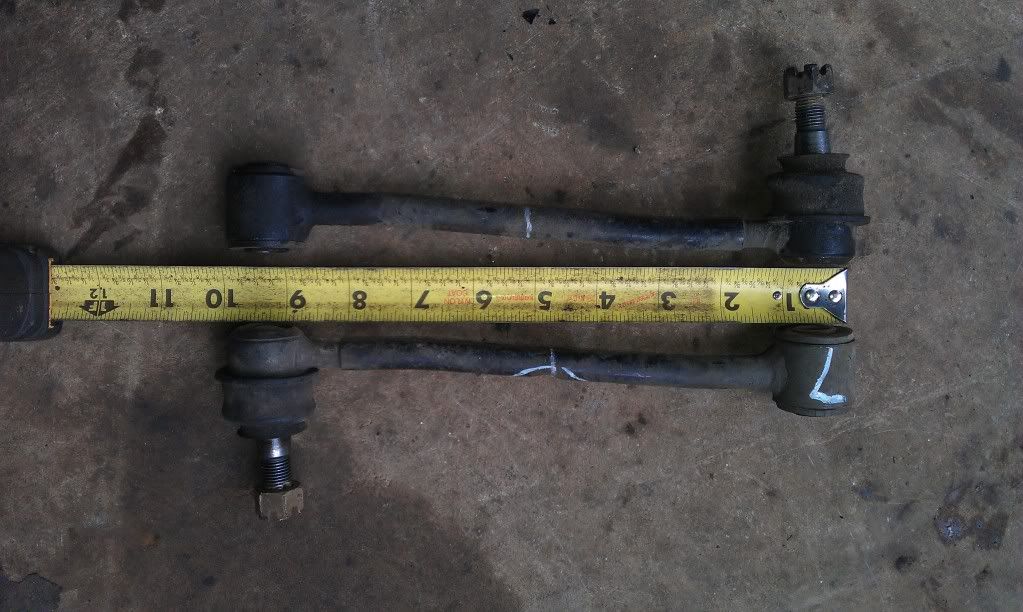 Marked where they needed cut, and hacked them in half 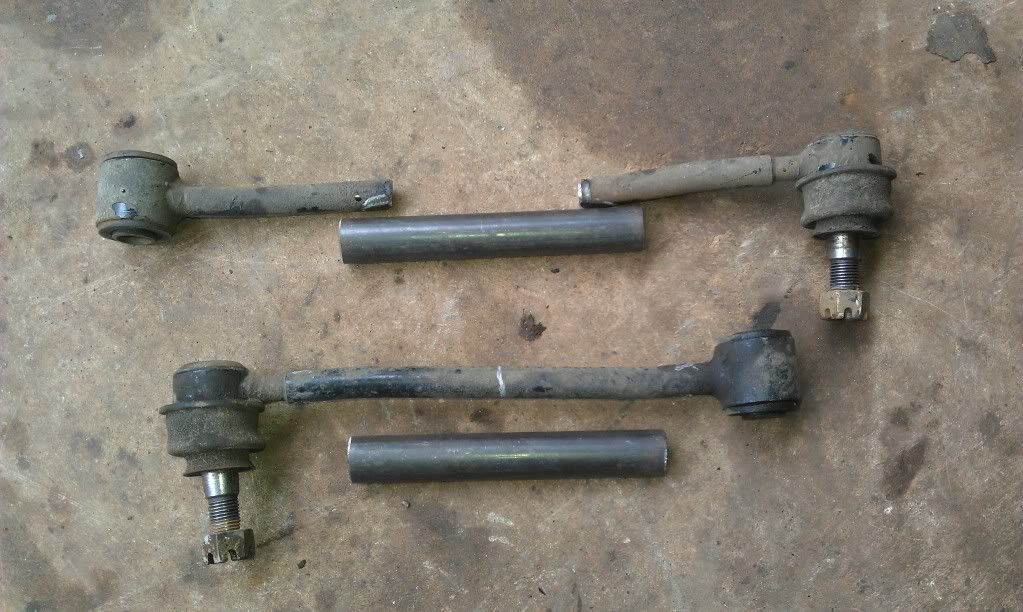 I had a bunch of this tubing laying around and it was a press on fit so I was happy about that. I cut them to 5" and drilled some spot weld holes in. 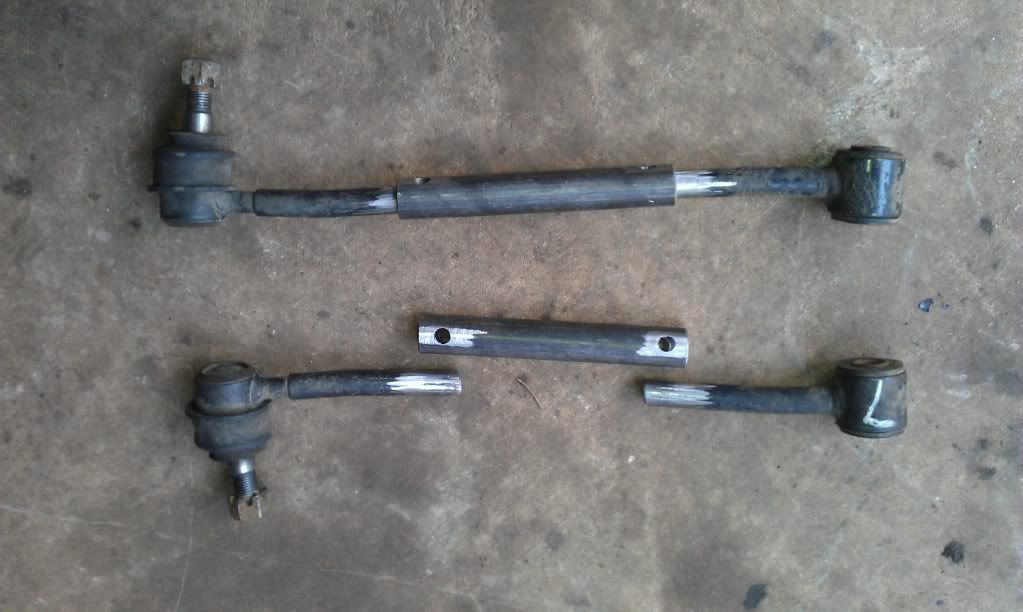 Burned them all together. 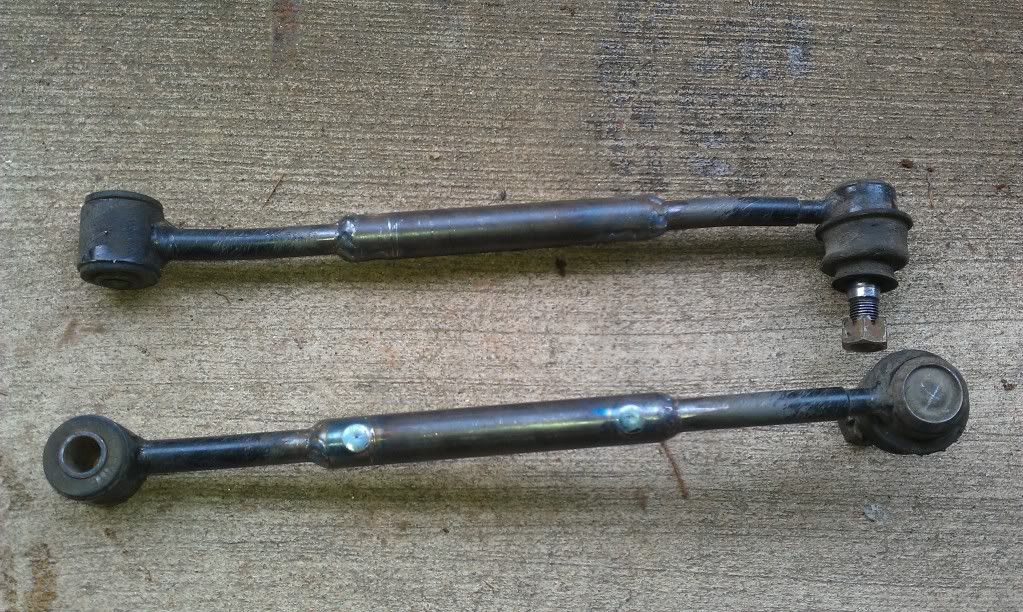 Painted and pretty. Almost ready to go back in but after the paint I thought I would press off the dust boots, re-grease, then press back on which I will do today. 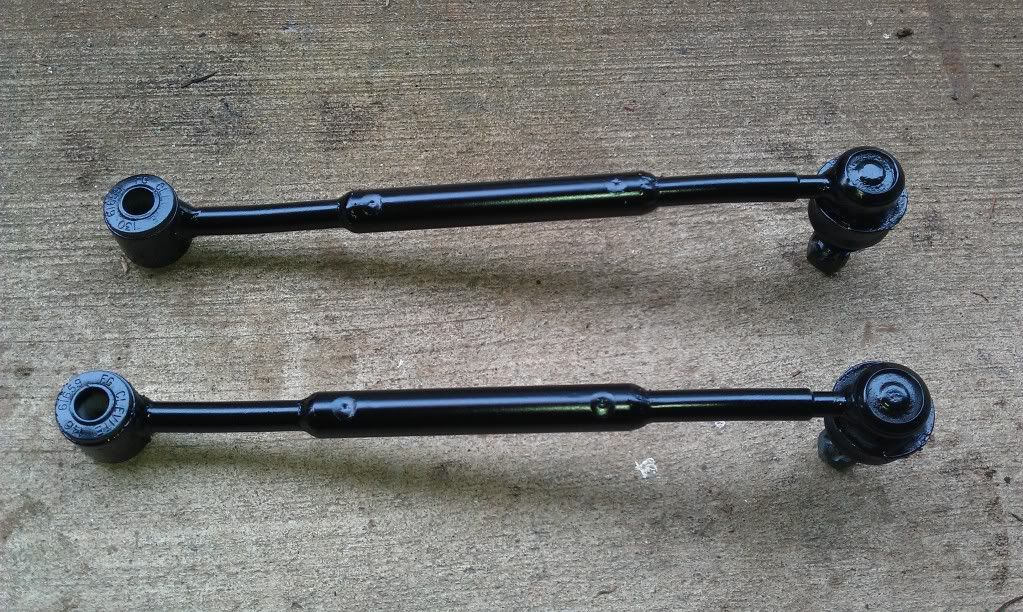 |
|
|
|
Post by fivendime on Mar 27, 2012 20:30:36 GMT -8
Onto the work! I recently replaced all the ball joints with new Dana/Spicer units. This compounded my terrible loose steering. So I ordered up a complete front steering kit as well as a new track bar. Got them all installed the other day and it fixed the random twitches in the steering that led me in random directions. Now its just a bit free for my liking so I'm working on tightening up the box a little at a time till I get it where I like it. Also spent some quality time with a small screwdriver and my AC condenser straightening cooling fins ;D
|
|
|
|
Post by bigstuck on Apr 23, 2012 18:31:30 GMT -8
|
|
|
|
Post by fivendime on Sept 27, 2014 9:58:38 GMT -8
I have been tired of the typical wandering steering from my 2nd gen. So I took a risk and it paid off. I decided to install the 4th gen 2008.5 and up steering on my truck. It was a little work but now it drives much better! Here is a write up of what it took to get it installed. Some details to note. Despite what people say you DO need to ream the knuckles out if your truck pre dates 99 model year. While it looks like it can bolt up nice and tight the taper is not the same. Its the same degree but the depth is wrong. The small diameter taper is the same but the large diameter taper is off. You will find that you will need to ream out approximately 3/16" to 1/4" in depth for the new steering. That being said I will post up my install photos. You can borrow a reamer from a friend, buy one or rent one from a local shop for around 20 bucks. Some cutting fluid and a super slow drill preferably under 500 rpm's is best. Make sure you keep the drill surface cool and free of shavings as often as possible. You will need to take the tires/wheels off the truck and put it on stands or you wont be able to ream the knuckles out. The pitman arm also needs reamed unless you use the one supplied with the kit. Since my truck is lifted I reamed out the drop pitman arm. Here are some photos of the process. This is the reamer you will need if you want to buy one. 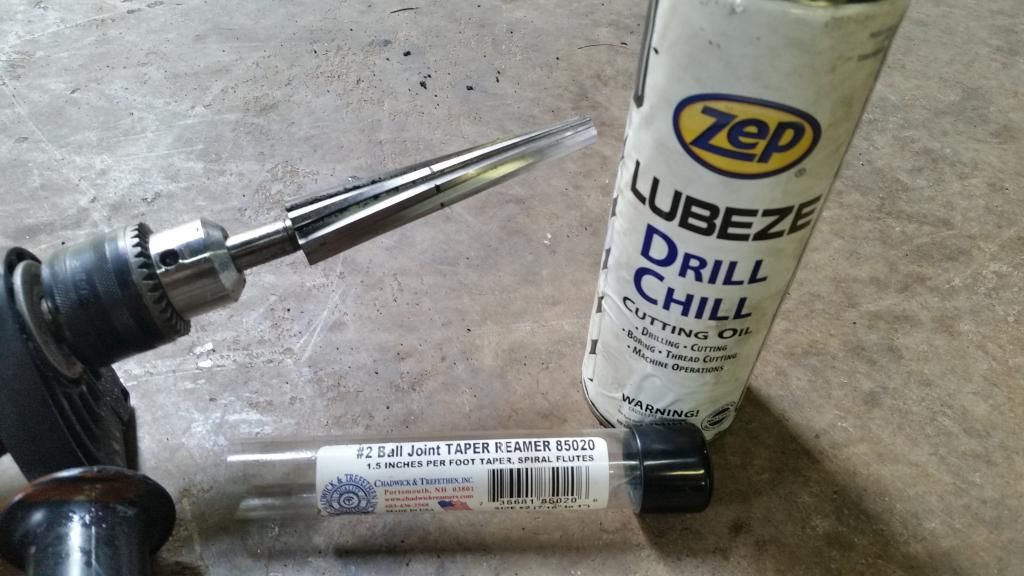 1 knuckle reamed out 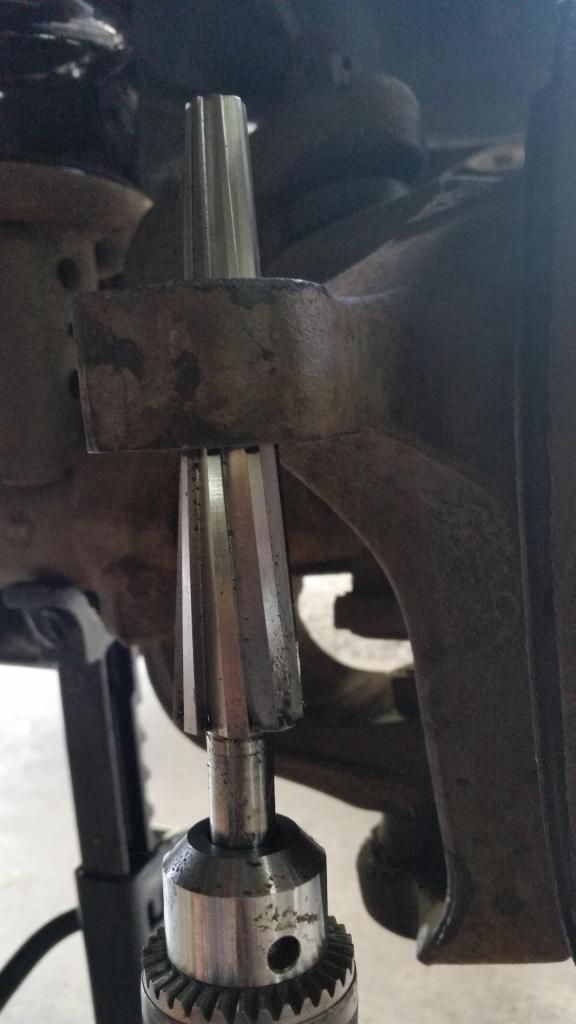 I knocked out the locating drift pin which is needed for the location of the Tie Rod End 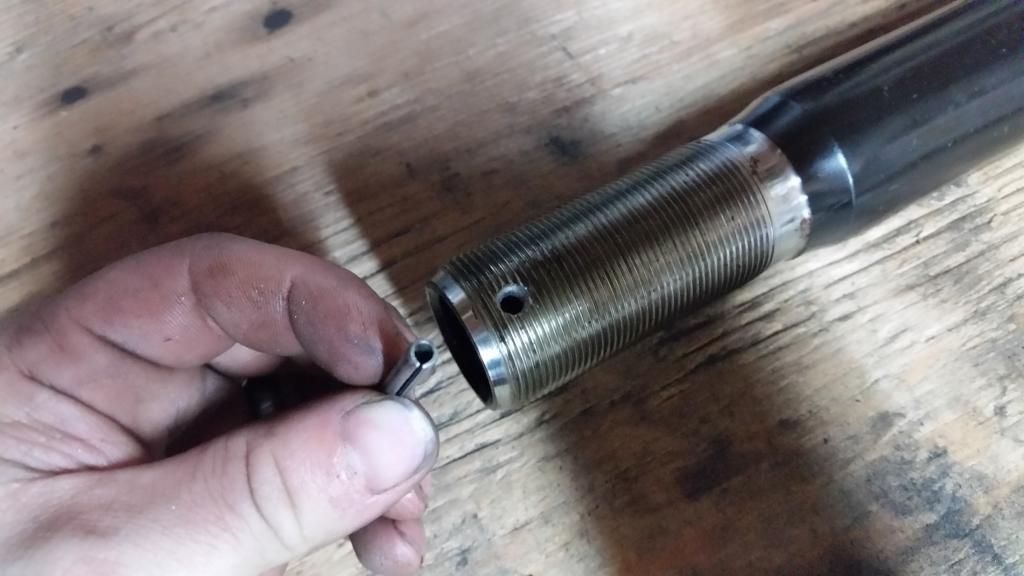 Then I drilled out a new hole. If memory serves a 3/16" drill bit is dead on size wise for the new drift pin hole. 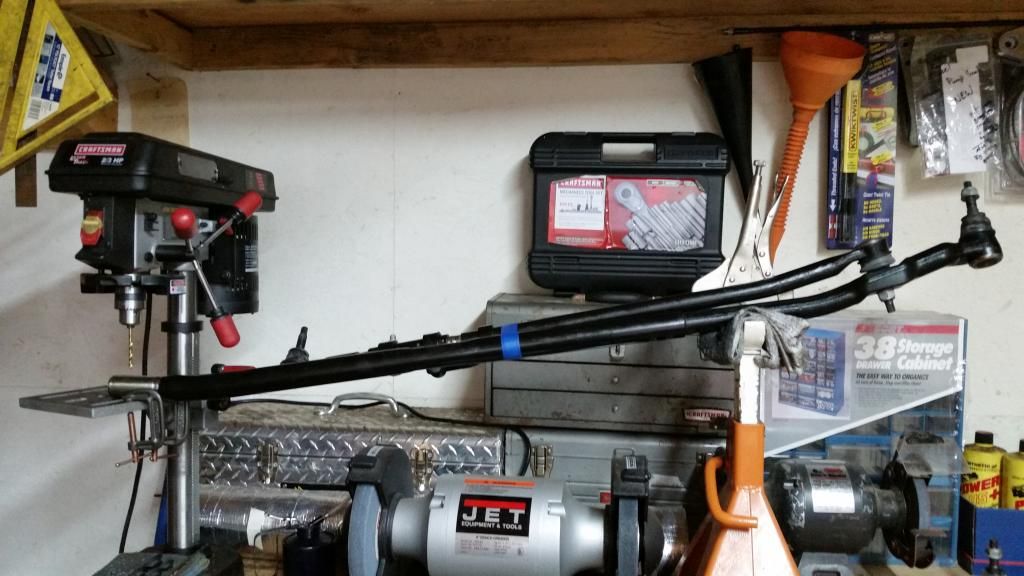 I made sure to chamfer the hole on both sides and take a small file to the threads to make sure no galling would happen. 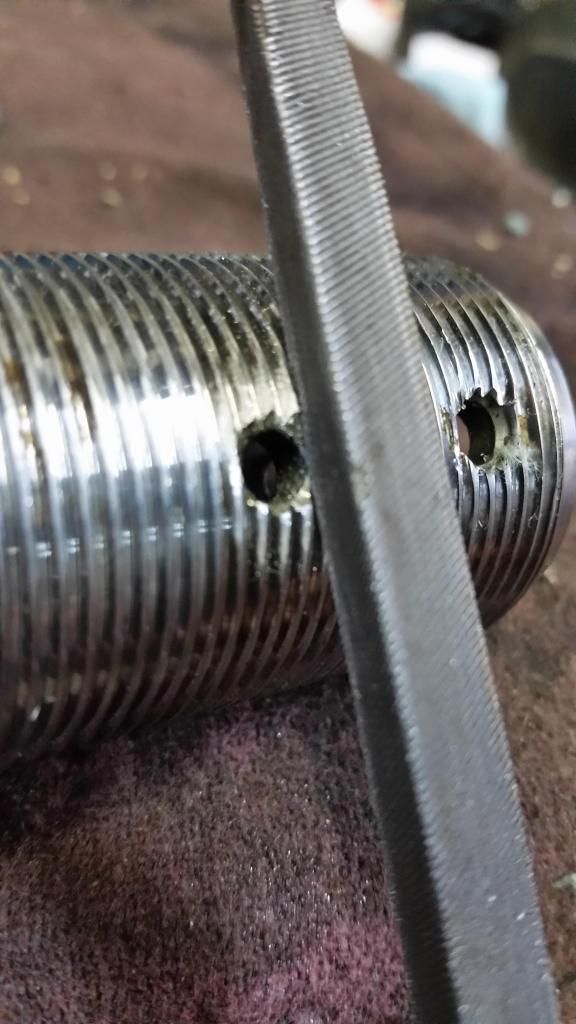 I opted to cut off about 5/8" on the long tie rod end with the drift pin (ie why I re-drilled it) This gave me a net adjustment of toe in at about 1". I know its not needed but I wanted a wide range of adjustment. 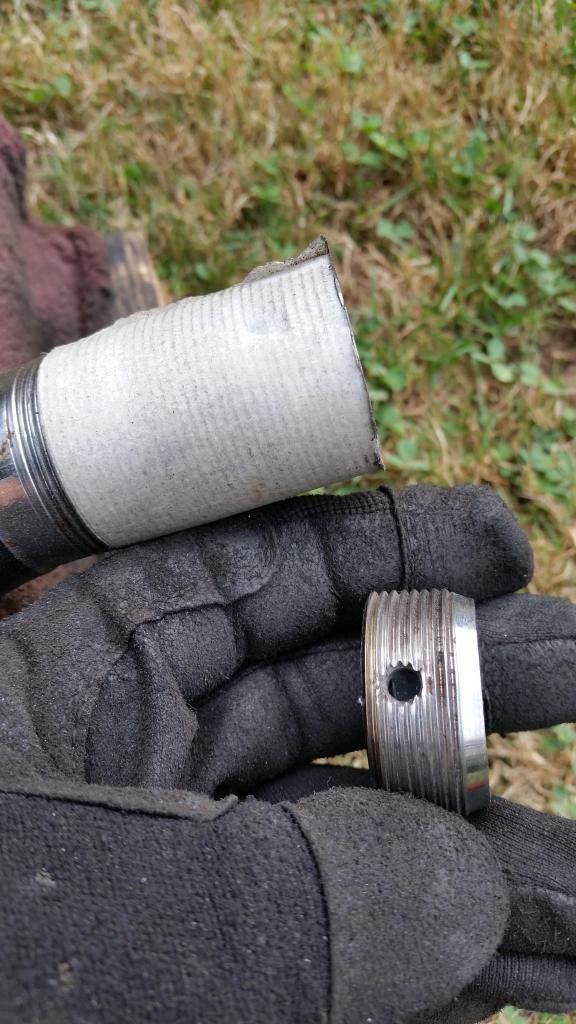 After it was cut I again put a chamfer on the threads I cut so the adjustment colar would screw on nice. Put all the parts together and bolted it up to the truck. As you can see I also put a steering box brace in. That will also help with the wandering. 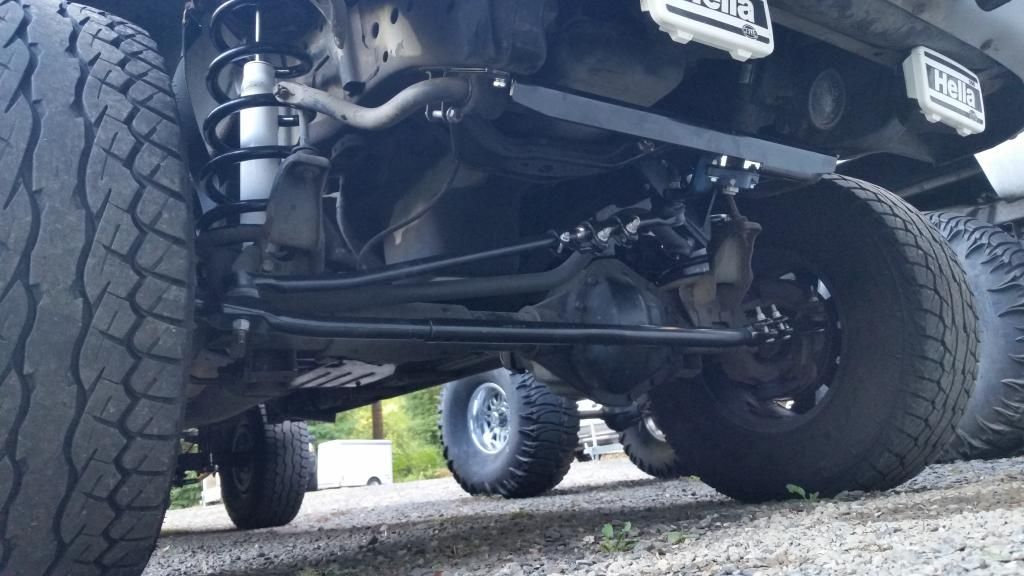 |
|
|
|
Post by ljdude on Sept 29, 2014 20:40:02 GMT -8
How does it drive now that you've done this?
|
|
|
|
Post by fivendime on Feb 26, 2021 14:52:22 GMT -8
How does it drive now that you've done this? Ha, well its been a while but it drove much better after that. Shorty after though, I did replace the steering box with a RedHead steering box, and replaced the steering shaft. The box made a heck of a difference, I highly recommend that upgrade if you have a these years of steering. Been busy on the truck the last few years, here's the updated info. Picked up a Roadmaster sway bar which helped with the camper sway some. Put a Mag-Hytec rear diff cover on for cooling, keeps it cooler then stock while towing. Next on the list was the Torklift Superhitch. My old hitch started to form a crack in it at the frame mount. I needed heavier duty hitch so the 20k Super Hitch fixed the issue. It also allows for 2 height settings which is nice for different height trailers. I later added a set of airbags and Torklift Stableloads, they work great together for hauling a camper, or heavy load in the bed. Built a set of mud flaps this year to keep from throwing rocks all over the front of the Toy Hauler. I added stainless weights to the flaps not in the photo.  Here recently I have been working on some more upgrades. After picking up the Toy Hauler I soon found a need for a little more power on the hills. The truck does just fine but it just needed a little more to be comfortable. So I picked up some things and dove in deep. The list of To-Do's is as follows. 1. New K27 turbo good for around 450 horse, a slightly larger turbo then stock, but a better flowing design capable of a little more boost. 2. New Delivery Valves. Injectors on a 215 P-pump are just fine for size, but the delivery valves were the restriction so larger ones were in order. 3. 3k governor spring kit. Opted for the 3k for drivability instead of the 4k. 4. 60 lb. valve springs on both the exhaust and intake sides. 4. PacBrake PRXB 4" inline exhaust brake, compressor and air tank. I opted for the stick mounted activation switch for easy operation. 5. Stock timing is set at 13.5 degrees on my truck, so I bumped it up to 16 degrees. 6. New headlight housings with better reflectors and some new LED bulbs. If the LED bulbs suck then I will be going back to halogen or HID, time will tell. 7. Oil and filter change, new valve cover gaskets, seals and washers for the injectors and lines. Pulled some coolant out and replaced with new. 8. New PDD high performance boot kit with constant tension clamps for all 4 boots. Figured it was a good time to replace the stock ones before they blow. 9. Dual band FM radio and a new CB will be installed in the cab. I think that should be about it.     |
|
|
|
Post by fivendime on Feb 26, 2021 14:57:17 GMT -8
|
|